I was a backer of Axoloti, a crowdfunded micro-controller board with inputs and outputs for audio and midi, as well as both USB client and host capabilities. The board is programmed with graphical patching software in similar to Max/MSP. I received my board shortly after I got my Eigenharp, and so I was too busy with EigenD and my new instrument at the time to give Axoloti much thought.
Anyways, as luck would have it, Mark Harris, a resourceful Eigenharpist and EigenD developer had gotten involved in Axoloti. One of his many contributions was adding MPE support, making Axoloti a convenient sound source for the Eigenharp and the other PMCs. As I result I’ve been planning on creating some MPE patches for a while now, and the other day I finally got started.

Creating synth patches turned out to be mostly like using a modular synth. The patching software was easy to use and the objects I wanted, like oscillators and filters were easily found and cabled up. A minor oddity is that a polyphonic patch is made out of a sub-patch containing a single voice and then a “parent” main patch to which that sub-patch is added. Once I had gotten used to this concept, creating a couple of simple, but expressive polyphonic sounds was straight-forward. The CPU power of a board like this is limited, obviously, but more than enough for what I wanted to do. As I’m routing the Axoloti through my Analog Four, using the effect section on that is more convenient than having resource-heavy effects as part of the patches anyways.
With a small collection of usable sounds, the next task was to figure out how to switch between them from the Eigenharp. An Axoloti patch can be compiled to a binary and loaded from SD-card. So the plan was to have the patches stored on the card and then find a way to make Axoloti load a given patch when it received a midi program change message. Creating synth sounds had been easy, but this part felt intimidating. I had a vague idea of what needed to be done and knew it would be possible. But I did not know how.
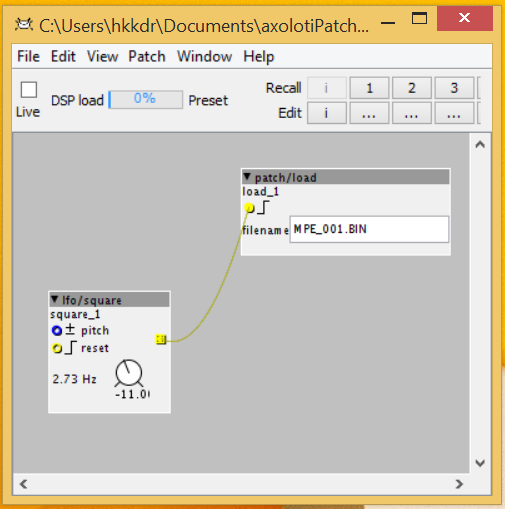
The first problem I needed to solve was what would happen when the card was powered on without a computer connected. Luckily that was an easy one to tackle. If there is a “STARTUP.BIN” file present on the SD-card, that will be automatically loaded to the board. I first considered having one of my sounds as a startup patch, but decided against it. I didn’t like the thought of having duplicate patches that both would need to be updated if I made changes to the sound. Instead I decided to make a simple startup patch that in turn just loads a given file name. In my case, that file would eventually become “MPE_001.BIN”. I found an object that sounded like it would do the job, connected it and it worked right away. Nice!
The next part was harder. I would need to find a way to map incoming program change messages to specific files on the card and load them. My first idea was to make some kind of string array with file names and use the program change value as an index. But I couldn’t get that to work.
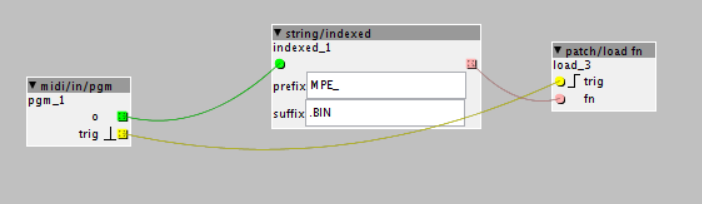
With a bit of help from the excellent Axoloti forums I instead tried an object that would generate a string from a prefix, an index number and a suffix. So by naming my files as “MPE_001.BIN”, “MPE_002.BIN”, etc, that object would create the file names I wanted from an incoming integer value. I still couldn’t get patches to load, though, and eventually gave up for the night. The next morning, and to my surprise, everything behaved as expected. Apparently a reboot or reloading the software had resolved whatever it was that had had me stumped for hours the day before.
When a patch gets loaded, the previous one is gone from memory. So the logic to load files on program change messages needs to be part of every patch. The most obvious way to deal with this would be to create a sub-patch and add it to all my sounds. However, a newly added feature of the Axoloti software allows for a “controller patch” to be automatically added to a patch when it is compiled. So I added my controller patch in the Axoloti settings menu and re-compiled my sounds. I then renamed them to to file names I wanted, and also added duplicates of the startup patch as “dummy” files for the first 16 program change numbers where a real patch didn’t exist yet.
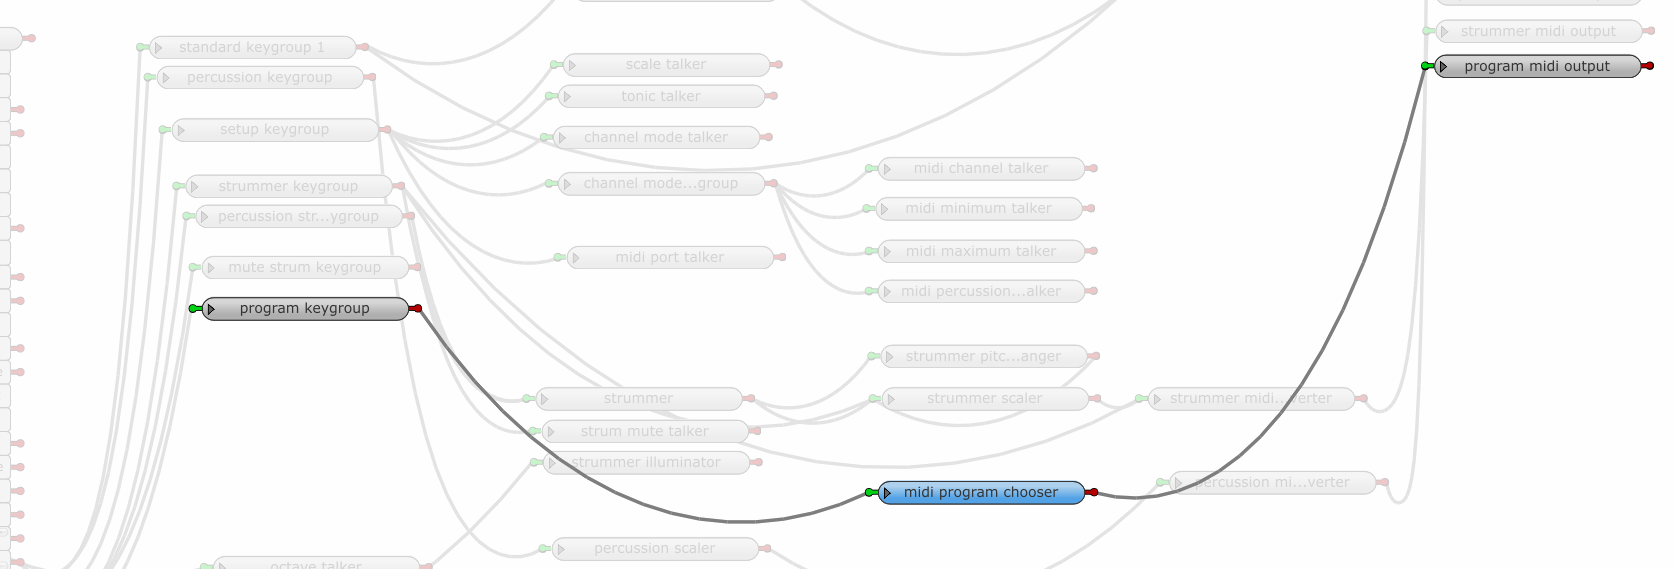
And so the Axoloti part of the setup was done. All that was left was adding the functionality for selecting programs from the Eigenharp to my EigenD setup. I was expecting to have to map belcanto scripting phrases to certain keys with talker agents, but that is a rather inelegant solution. However, I discovered a “Midi Program Chooser” agent made (again by Mark Harris) which made the EigenD setup a breeze. So I added a dedicated prgram change page to my setup, made a keygroup of 16 keys (thinking 16 programs ought to be enough for the time being) and connected it to the program chooser agent. I then first tried connecting the program chooser agent to my existing main midi out agent, but that didn’t work. I don’t know why I can’t connect several agents to the same midi output, but I remembered encountering this issue before and just added a new midi out agent instead. And I was done!
The whole project turned out to be quite a bit of work since I didn’t really knew what I was doing. But the result is that the Eigenharp now has a dedicated sound source that is easy to add more sounds to. Both the Raspberry Pi running EigenD and Axoloti are hidden away in a drawer, out of sight and always connected. So now, whenever I want to use the Eigenharp, all I have to do is pick it up and start playing!

Leave a comment